All your employees/masters, without leaving their workplace, can view all bookings using a mobile phone. Employees can also check their schedule in off hours. This allows you to establish remote coordination of personnel without any additional effort. To do this, we have developed the Altegio mobile application.
Access settings
Create an individual access for each employee in the Altegio web version:
1. Go to Settings > System Settings > Users, add a new user or invite an existing one (see more in the article).
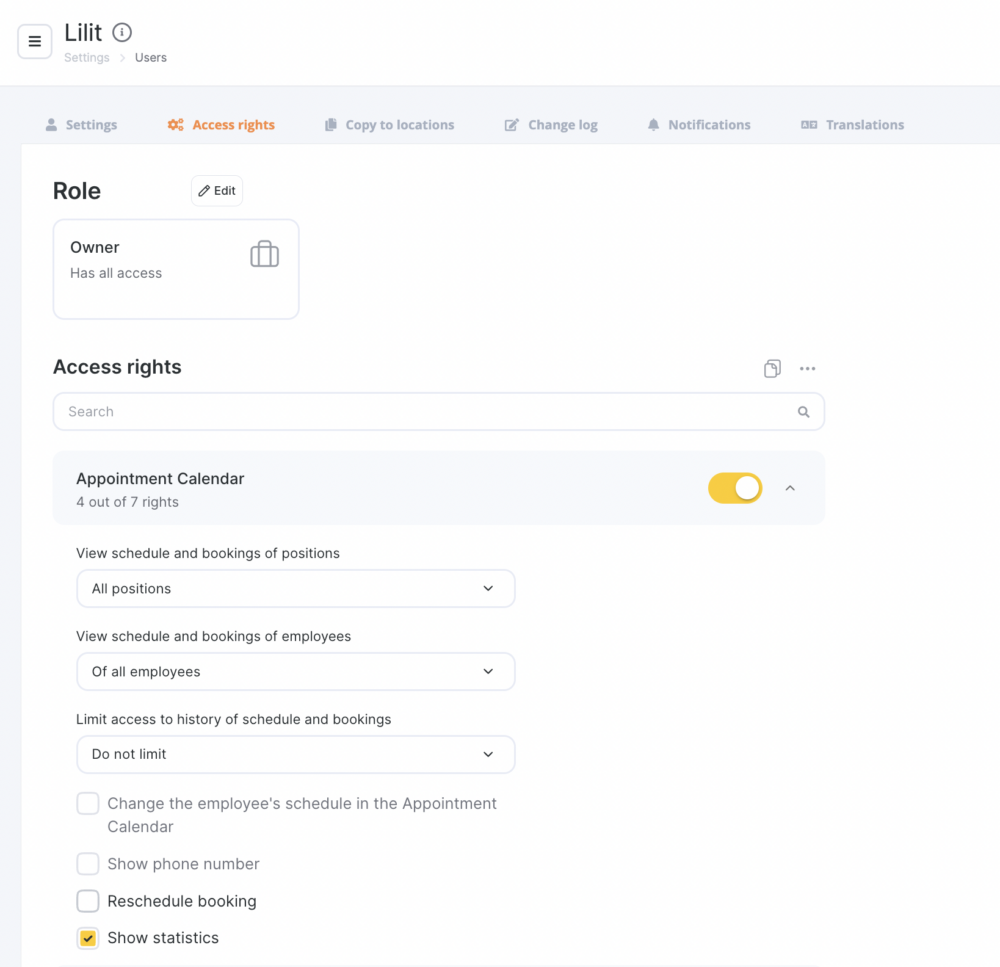
2. Go to the Access rights tab and set the following user access rights in the Appointment Calendar section:
- View schedule and bookings of a specific employee. To do this, in the drop-down list, instead of All employees, select the name of the employee to whose schedule access is granted.
- Change the employee’s schedule in the Appointment calendar (if it is necessary for the employee to set up the schedule and add/remove breaks).
- Show phone number (if it is necessary to allow an employee to view customer phone numbers).
- Reschedule bookings (if it is necessary to allow an employee to reschedule bookings).

You can also limit access to the history of schedule and bookings.
3. After accepting the user’s invitation, the employee will be able to sign in to the mobile application using the credentials: login (phone number or Email address to which the invitation was sent) and password (the user needs to create a password himself during registration, if necessary, it can be restored).
Additional access rights settings
To work comfortably in the Altegio mobile application, additional access rights settings may be required. Below are examples of the most popular rights that managers set for their employees.
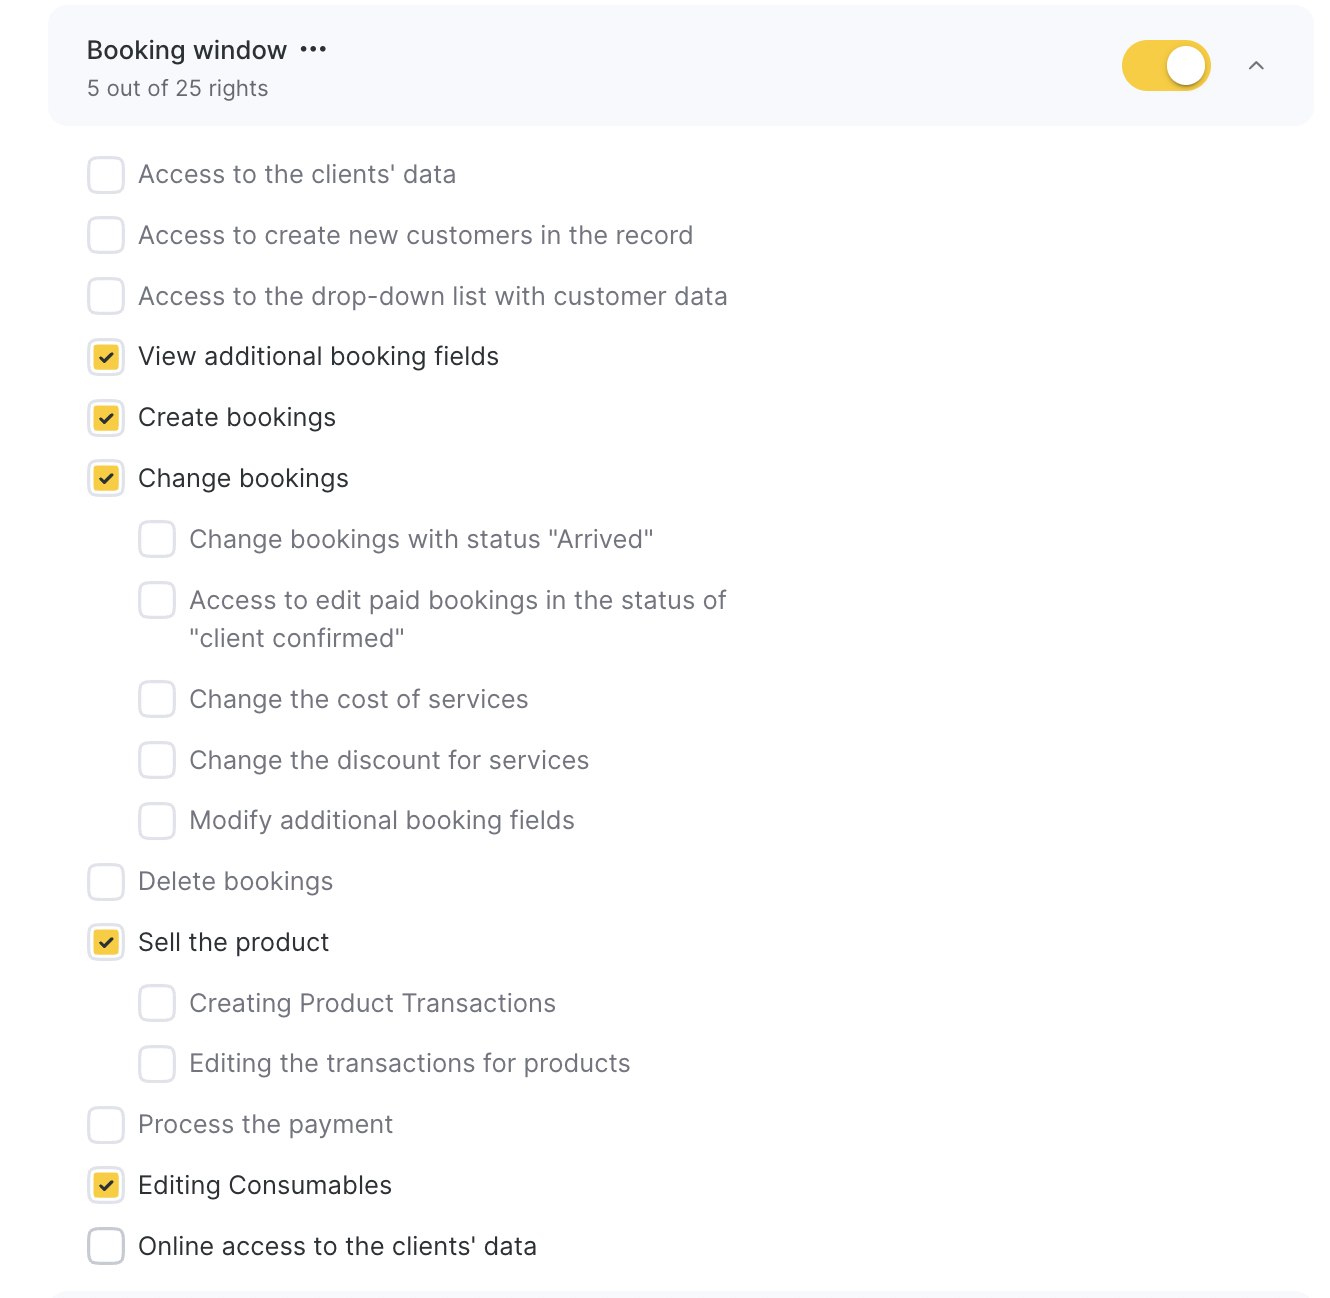
1. To view the data about bookings or events, access to the Booking window section is required. Without additional rights in this section the employee will only be able to view basic information on the booking or event. Check the following rights if necessary:
- Create bookings (an employee can create bookings in the calendar).
- Change bookings (due to this right, an employee can add comments to an already created booking, if necessary, you can configure additional rights for changing booking).
- You can also, if necessary, grant rights to delete bookings, make payments, sell products (including memberships and gift cards), view additional booking fields, write off consumables and view customer data.

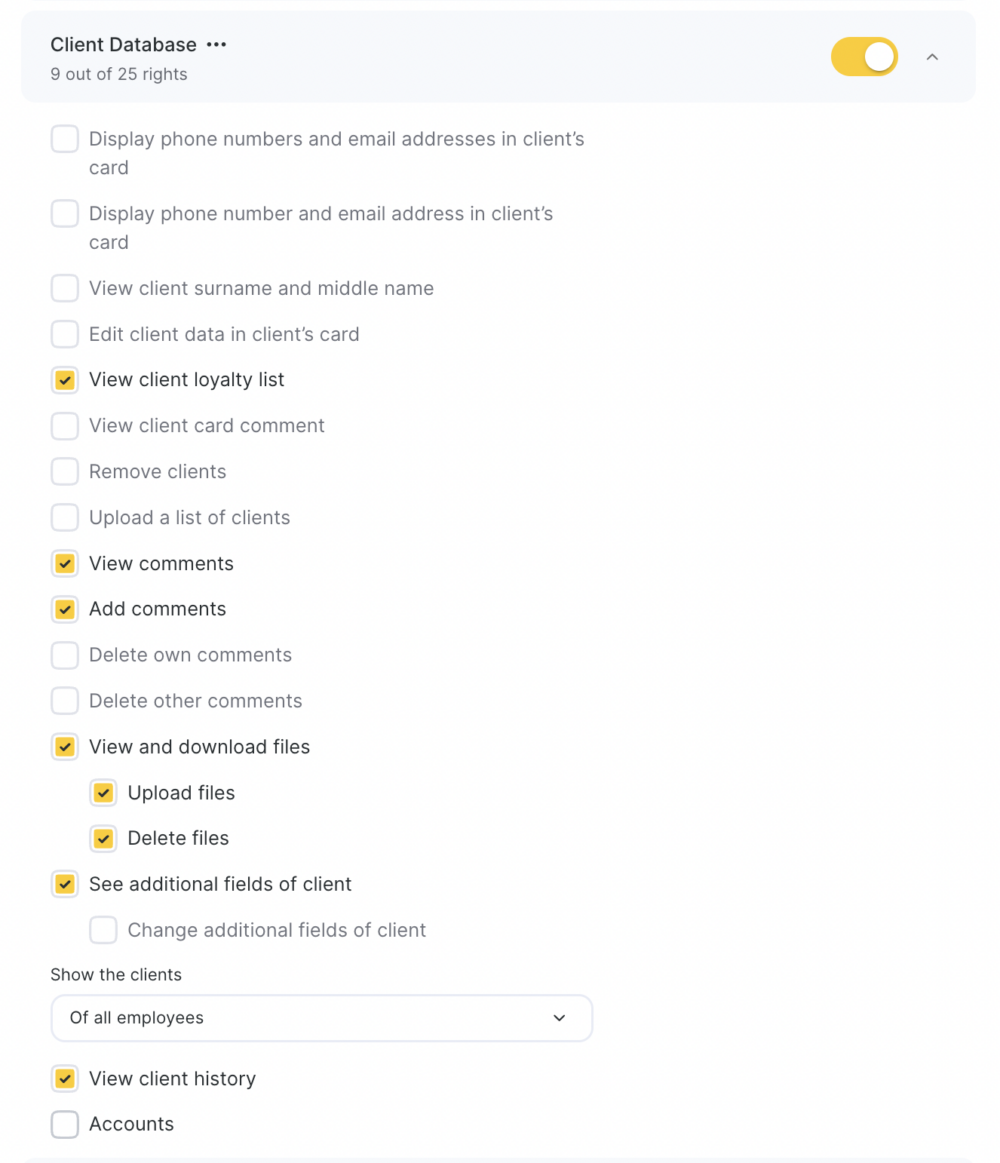
2. In the Client database section check the View client history box. Having this access right, the employee will be able to view data on previous or upcoming bookings of the client. Access to the Client database section without additional rights allows to view general data about the client, as well as add a note in the client card.
Access to customer contact details is regulated by a separate setting. If it is not checked, the employee will not see this information.

3. If you are concerned about the customer data safety, then access to them can be restricted. The employee will see all the important information, except for customer contacts.
Specific access settings in different sections are responsible for viewing the client contact details. If you do not want the employee to see the client’s phone number and Email, do not grant the rights from the list below.
Right in the Appointment calendar section:
- Show phone number.
Rights in the Booking window section:
- Access to the clients’ data,
- Access to the drop-down list with customer data,
- Online access to the clients’ data.
Rights in the Client database section:
- Show phone numbers and email in customer list,
- Show the phone number in the client’s card.
Rights in the section “Overview” (this section is displayed only in web version of the program):
- Summary section — Show phone numbers in the summary,
- View the list of bookings — Show phone numbers in bookings,
- View the detail of messages — Show phone numbers in messages,
- Section “Calls” — Show client’s phone numbers.


